Make Your Own Christmas Decorations
Don’t keep your festive spirit locked inside; shout it from the rooftops! Wear that novelty jumper with pride and swathe your home in bright homages to everybody’s favourite time of year. We’ve got January for scrimping and February for making sensible plans; this moment is all about gleeful Christmas decorations excess, so here’s a guide on how to make your own Christmas decorations.
And if you’re going to glitz up the house for Christmas, do it right. Forget extensive tat and instead make your own unique embellishments for mere pennies. Craft creating can be so satisfying, so ransack the art supplies in true Blue Peter style and get all the family involved.
Below are a couple of the items we’ve been making at RLD HQ, with a step-by-step photo guide. All the DIY Delia’s out there: if you do try these out, make sure you send us a snap on Twitter. We can’t wait to see how they turn out.
(Think that art’s for life and not just for Christmas? Pick an art class from our manifold options and keep the creative buzz going all year round.)
❄ Paper Snowflakes ❄
Here’s a simple take on the classic paper doily, just right for sticking to window panes, suspending from the ceiling with thread or backing with card to create Christmas cards.
You will need:
~ Pair of sharp scissors
~ White paper
~ Hole punch
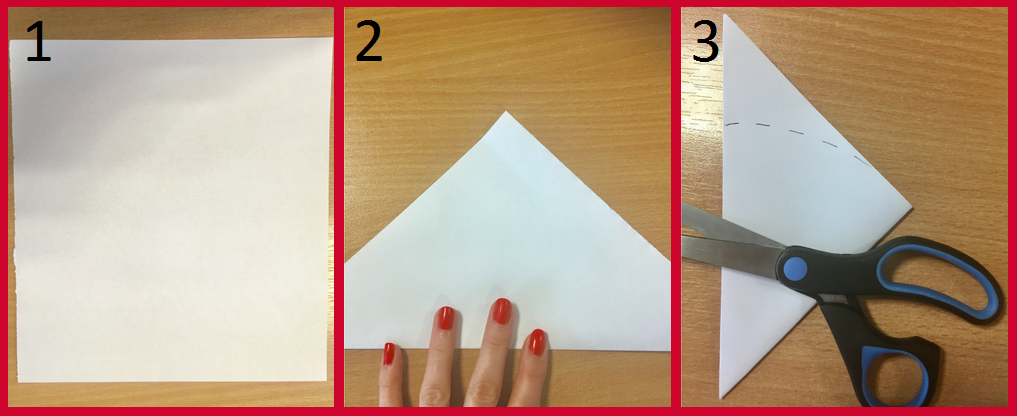
1. Cut or rip your white piece of paper into a rough square.
2. Fold the paper into a triangle, and again into a smaller triangle.
3. Cut off the loose point to create a sort of cone shape.
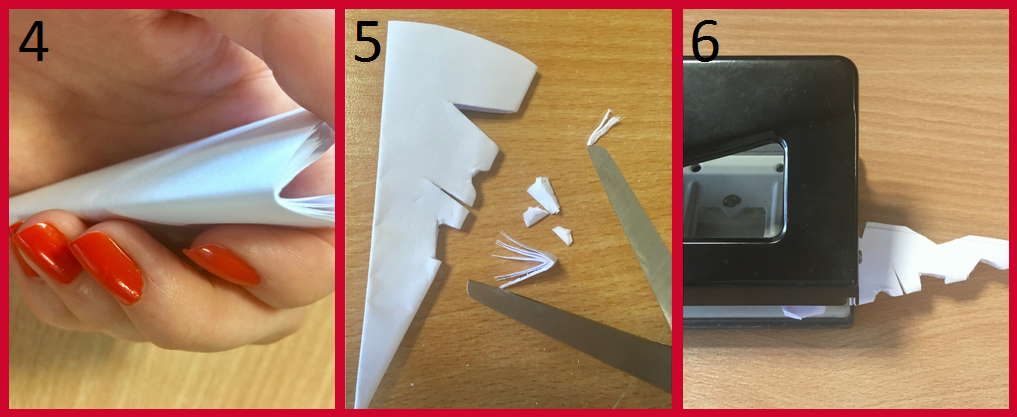
4. Now fold the triangle another couple of times until it can’t be folded anymore. Make sure to fold around the same point so that you have one thick edge.
5. Cut shapes and slits into your cone. The cuts on the thick folded edge will make the most impact on the final design.
6. Adding a few holes with a hole punch is an easy way of getting some different interesting shapes in the design without having to cut in from the edge.
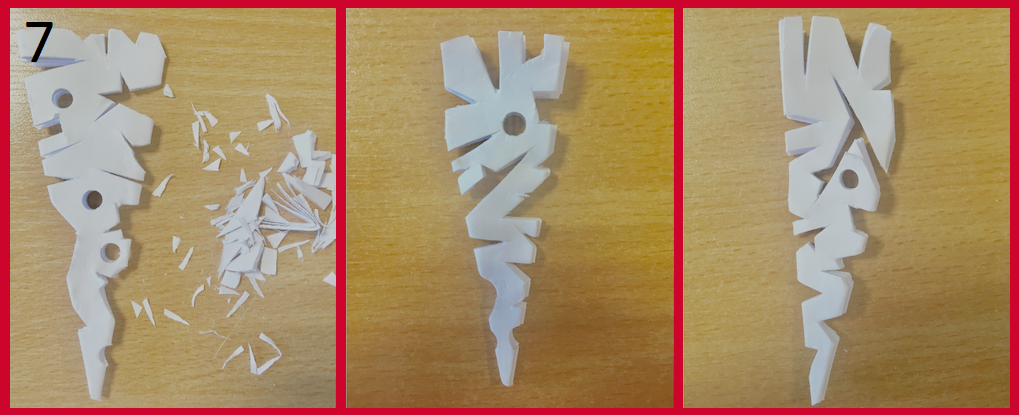
7. The trick to a beautiful snowflake is to put as many cuts in it as possible. Stop when you can’t add any more without risking cutting through and splitting the cone.
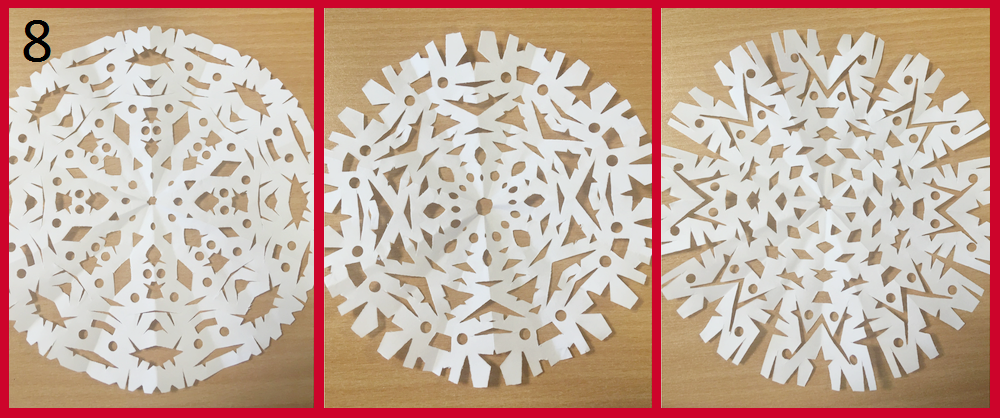
8. Very gently, open up the designs and flatten them with a heavy book or with your hands. This is the best bit, as you find out how your snowflake has turned out.
❄ Go on, give this decoration a go! ❄
⭐ Homemade Christmas Tree Toppers ⭐
Simple to make but impressive-looking, this Christmas tree topper can be made to custom sizes and decorated to fit in with your other Christmas decorations.
You will need:
~ Pair of scissors (or craft knife)
~Craft mat
~Ruler
~ White paper or card
~ Glue
~ Paint or glitter (optional)
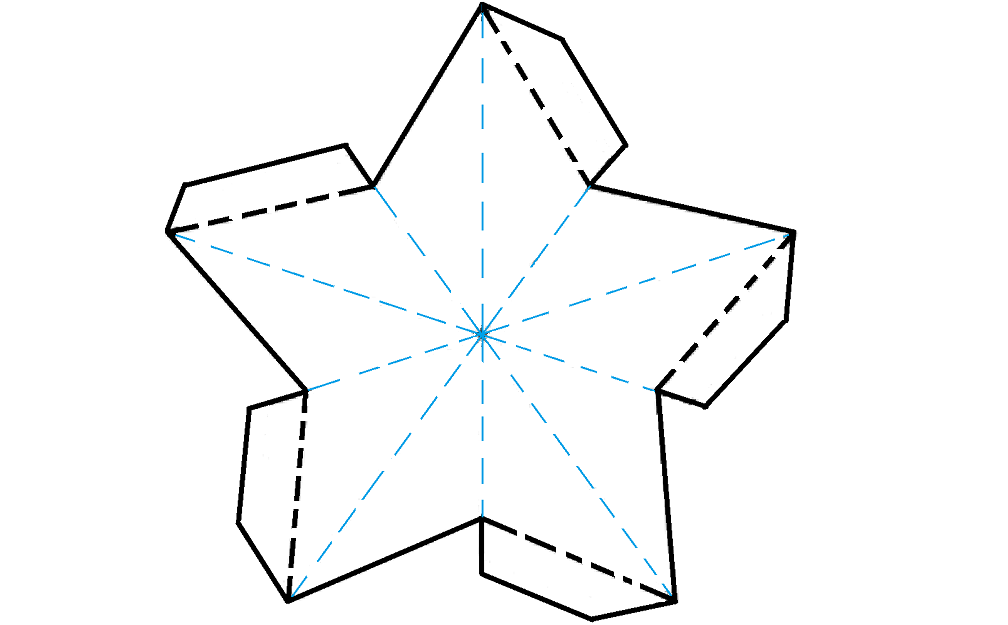
To make things easier, we’ve created this template which you can print out. You’ll need two copies. The dotted blue lines should be scored; the black dotted lines are to be folded; the solid black lines are to be cut out.
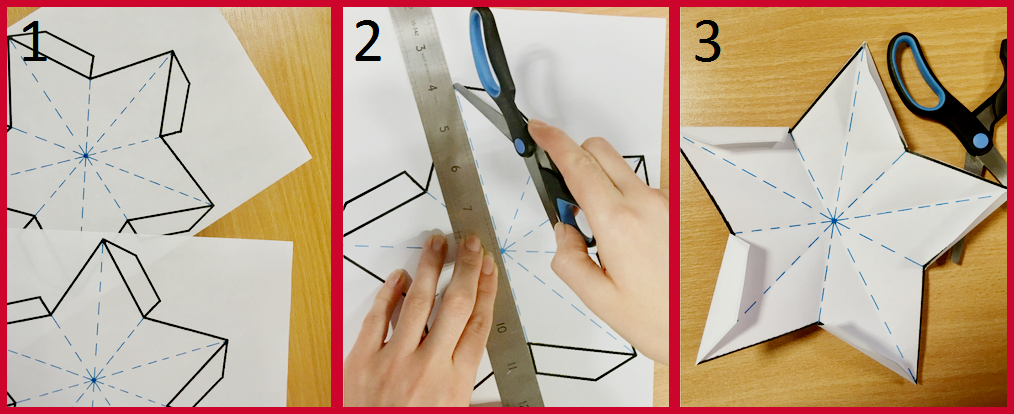
1. Print out two copies of the star template (provided above). The lines will not be visible when the star is assembled.
2. Using a mat and a craft knife or pair of scissors on a protective craft mat, gently score the blue lines. Make sure not to cut through. This will make them easy to fold later.
3. Cut around the outside of both of your stars and fold down the tabs along the black dotted lines.
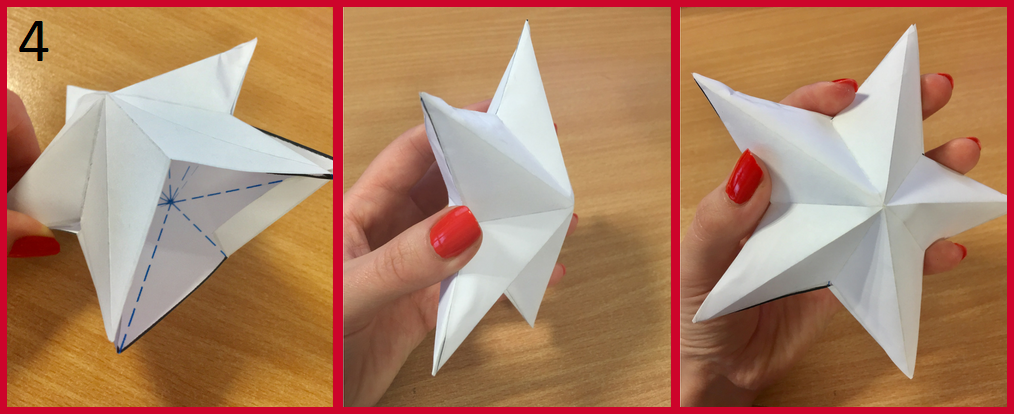
4. Now it’s time to slot the two stars together to create a 3d shape. Apply glue to the outside of all the tabs. Slot the tabs inside the other star and gently press to stick. carefully mould the star into the right shape, using the scored lines.
⭐ How will yours turn out? ⭐
Images: Red Letter Days‘ own
If that’s got you into a DIY mood, why not check out another of our blogs encouraging handcrafts. Or how about moving that creativity into the kitchen? Check out our Winter Warmer Recipes: #MeatFreeMonday Edition for delicious, comforting fare.
